Monday, September 21, 2020

How To Overcome "Word Cannot Complete The Save Due To A File Permission Error"

How To Overcome "Word Cannot Complete The Save Due To A File Permission Error"

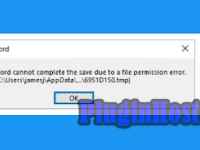
Have you experienced Microsoft Word can't save files? Usually you will receive a message that says Word cannot complete the save due to a file permission error. Even though at that time you were working on an important document you should immediately save it for you to print. But unfortunately Word can't even save it. You can imagine when this happens to you.

How To Overcome "Word Cannot Complete The Save Due To A File Permission Error"

You've typed a lot, while you can't save it. Even though the file must be immediately transferred to the flash disk for you to print. Surely this problem will make you or anyone who experiences it will be very frustrated.
 
You may not have to type from scratch because you don't have enough time to do it. If you could, maybe the results would not be as good as the first one because now you have to do it in a hurry.

How to Overcome Word Cannot Complete The Save Due To A File Permission Error


Here are two steps for how to deal with Word cannot complete the save due to a file permission error easily and successfully.

1. Enter Safe Mode First

The first thing you need to do is enter Safe Mode. This is to check whether Microsoft Word can run normally when it enters Safe Mode. If so, then there is something that causes your Microsoft Word to display the notification "Word Cannot Complete The Save Due To A File Permission Error". And the most frequent cause of this is the Add-ins installed in your Microsoft Word.

2. Disable all add-ins in Microsoft Word

Open your Microsoft Word then click File.

Disable all add-ins in Microsoft Word

After that you enter the Options menu.

Disable all add-ins in Microsoft Word

Next select Add-ins.

Disable all add-ins in Microsoft Word
   
Removing add-ins is done one by one. Select the desired add-ins (number 1) then select Disable Items (number 2) then click Go (number 3). For the time being, remove all add-ins. Finally select OK.

Disable all add-ins in Microsoft Word

If so, try your Microsoft Word again. Try checking whether the notification Word Cannot Complete The Save Due To A File Permission Error has disappeared or not.

Cause Word Cannot Complete The Save Due To A File Permission Error


The message Word cannot complete the save due to a file permission, this error must appear not without reason. The causes themselves are actually quite a lot and every Microsoft Word user must experience or feel the problem due to different causes. However, in general this problem is due to Ms. Word does not have administrative rights to save the file.

Maybe you are asking now, why do we, who are the owners of the computer or laptop, don't even have admin rights? The answer is because the system wants to protect your device from certain applications or programs that might cause problems with your device. Some problems that can attack your device such as viruses or malware.

When you do not have administrative rights, the virus or malware cannot enter and attack the system. So, these malicious programs can only read but cannot write or edit the system that is in this device. In other words, your device will be safe from problems that can harm you. Besides that, there were several other problems that resulted in Ms. Your Word won't save which we'll explain below.

1. Where to Store Error
Cause Ms. Your Word cannot be used to save files because of the error location or storage media. Maybe when you want to save files, storage media such as flash drives are not completely stuck. It can also be stuck on the flash but suddenly not detected by your operating system. So, when you want to save it, it is certain that you cannot save the file on the flash.

2. Files Affected by Viruses
The second reason that results in the file not being saved is because the file has been infected with a virus. Before you save it, it turns out that the virus has infected the file which makes you unable to save it. It could also be that the storage place you want to choose is infected with a virus. So the solution is to try to scan with a trusted antivirus in the storage area or you can also store it on another drive.

3. Full Drive Capacity
Files that cannot be saved can also be because the storage area is full. You can check your own Drive where files are stored whether the capacity is full or not. If so, then you can be sure that the file cannot be saved so the solution is to save it on another drive whose capacity is not yet full.

Hopefully what I have discussed and shared can be useful. That is all and thank you.

Friday, September 18, 2020

How to Overcome Windows Script Host Disabled in Windows

How to Overcome Windows Script Host Disabled in Windows

Some of you may have experienced problems when opening certain windows scripts on windows or unconsciously the windows displays a popup window with the problem "windows script host access disabled this machine. Contact your administrator" be it on windows 7, 8.1 or even windows 10.

How to Overcome Windows Script Host Disabled in Windows

This is usually blocked by anti-virus or by the system from your computer. Then how do I fix it? For those of you who experience this problem, you usually install Smadav anti-virus. If so, you can be sure Smadav is the cause. then how to solve it?

1. The first step if it's from Smadav Anti virus.
  • Right-click the Smadav Icon on the Try Windows System
  • Then Select "Allow Windows-Office Macro" (Permanent)
  • Then OK
  • Then restart
  • Done

Note: Or you can directly Exit the Smadav icon on the Try system.

2. Other steps if there is no Smadav
  • You can enter the system Registry, by "press the key: Win (Windows logo) + R" | on the keyboard
  • then type: regedit then enter, please find the following list
HKEY_LOCAL_MACHINE \ Software \ Microsoft \ Windows Script Host \ Settings \ Enabled
  • Look for "Enabled" in the name line, please double click it, and enter the number 1
  • or if you have trouble, please edit the registry, use the file REG Fix => REG Fix Windows Host Script | double Click select Yes seen successfully
  • then restart
  • Done

3. Or Other Steps if all above doesn't work
  • press the key: "Win (windows logo) + R" | on the keyboard
  • type: "msconfig" then enter,
  • on the tab "general" uncheck Load Startup Item
  • then go to the Service tab. Check "Hide All Microsoft Service"
  • then click "disable All"
  • Click OK and Restart

Note: Step 3 is not recommended, if it is not really methods 1 and 2 work!
 
I hope that what I have shared can be useful and useful for you. That is all and thank you.

Thursday, September 17, 2020

How to Change Microsoft Edge Search Engine from Bing to Google

How to Change Microsoft Edge Search Engine from Bing to Google

Maybe there are some people who feel uncomfortable with using the Default Search Engine from Microsoft, namely BING, including myself, in a browser made by Microsoft which is now a better evolution, namely Microsoft Edge, of course as people or many people will like and use the Microsoft Edge browser for now as a medium for content search on the internet.

However, because the default is Bing, this time I will provide a tutorial on how to change or change the default AddressBar or Media Search Engine, mainly from Bing to Google Search Engine.

Just go to the tutorial Changing the Microsoft Edge Bing Search Engine to Google, please do the method below on your Microsoft Edge!

Please go to menu >> Settings! See the image below

How to Change Microsoft Edge Search Engine from Bing to Google


then click menu >> Privacy and services >> Address bar
 
How to Change Microsoft Edge Search Engine from Bing to Google
 
Then change from the default Bing to Google
 
How to Change Microsoft Edge Search Engine from Bing to Google
 
Done.

Hopefully what I have shared can be useful and useful for all of you. That is all and thank you.

Wednesday, September 16, 2020

How to find out the type of MBR or GPT hard drive partition

How to find out the type of MBR or GPT hard drive partition

Maybe you are planning to reinstall Windows on your computer, first determine your Bios Legacy or UEFI, and your computer's current hard disk partition type! Why should you know the type of MBR or GPT hard drive partition? yes, because later when you reinstall Windows, you already know I will make a windows installer for the MBR or GPT partition type.

Well, this time I will give a tutorial for those of you who are confused about how to find out the type of your hard drive partition when you decide you want to reinstall your windows computer. I will use the software here to provide information on MBR or GPT hard drive partition types, why? because later you can convert or convert from MBR to GPT usually or vice versa.

The first thing you need is the AOMEI Software Partition Assistant software, which you can download below.

Jump to the steps How to find out the type of MBR or GPT hard drive partition
  • Install AOMEI Software Partition Assistant first
  • then you run the software, and will see a display like the image below


AOMEI Software Partition Assistant

  • See the image info above, it says Basic MBR, that means the type of partition used is MBR
  • Meanwhile, if it is written GPT, the partition type used is GPT.
  • May be useful

Conclusion: from the info above, you can see the current partition type on your hard disk, so that when you reinstall Windows, you already know that your partition type is MBR or GPT.

Hopefully what I have shared, it can be useful and useful, friends. That is all and thank you.
What is the Difference Between a UEFI BIOS and a Legacy BIOS

What is the Difference Between a UEFI BIOS and a Legacy BIOS

Difference Between a UEFI BIOS and a Legacy BIOS - For those of you who are often involved in the computer world, especially technicians, of course, have you seen a different BIOS on an old computer and a new computer with certain specifications? Yups usually makes a difference, now there is a UEFI BIOS and then a Legacy BIOS.

Usually the most basic when we see the difference between these two types of BIOS is its function to support the hard disk capacity, which Legacy is only up to 2 TB (Terabytes) maximum (that's the Master Boot Record MBR mode), while the UEFI BIOS type can be more than 2 TB (Terabytes) with GPT (Guid Partition Table) mode. The number of newer high-spec computers is usually a UEFI BIOS as it is synonymous with big usage.

Understanding BIOS

BIOS stands for Basic Input Output System. is a piece of software (written in assembly language) that regulates the basic functions of computer hardware. The BIOS is embedded in a memory chip (ROM or Flash Memory made from Comlpimentari Metal Oxide Semiconductor (CMOS) on the motherboard. A battery which is commonly referred to as a CMOS battery serves to keep the date and other settings that we have set in the BIOS from missing or returning. to the initial configuration even when the computer is turned off.

Then what is the Difference Between a UEFI BIOS and a Legacy BIOS?

Here are the differences between a UEFI BIOS and a Legacy BIOS in outline:

  • In terms of interface, UEFI supports mouse use and even touchscreen or touch screen while Legacy only supports keyboard only.
  • In terms of appearance, the Legacy interface is still standard while UEFI has a more attractive appearance.
  • UEFI supports hard disk capacities of more than 2 TB while Legacy bios only 2 TB is the maximum capacity, meaning it can't be more than 2 TB.
  • Regarding the hard disk type, uefi is obliged to use the GPT (Guid Partition Table) while the legacy bios uses the MBR (master boot record) type.
  • For windows installation, Legacy is easier than UEFI.
 
BIOS LEGACY example - Looks like this or something similar

BIOS LEGACY

Example of a UEFI BIOS - Looks like this or the like, more full color with more advanced settings, of course.
 
UEFI BIOS
 
That is the difference between the UEFI BIOS and the Legacy BIOS, hopefully what I have explained can be useful and useful for you. That is all and thank you.
How to Make Bootable Media AOMEI Partition Assistant

How to Make Bootable Media AOMEI Partition Assistant

This time I will share how to make a Bootable Media AOMEI Partition Assistant, the goal is of course to help those of you who are confused about making a bootable AOMEI Partition.

Then what are the goals? Later I will provide a tutorial on the function of this and its clear objectives are useful for those of you who want to convert the type of partition from MBR to GPT or from GPT to MBR or other partition management standalone in a bootable manner without having to run on Windows.

So you can convert partitions or create a type of hard disk partition without having to install Windows first. In the following I give the tutorial How to Make Bootable Media AOMEI Partition Assistant.

The steps are!

1. Prepare the materials below that must be downloaded, except for the Flashdisk

=> Bootable Media AOMEI Partition Assistant ISO | alternative link

=> Rufus Latest Version

=> Flashdisk 2 Gb or 4 Gb or more


2. After downloading, Plug the Flashdisk into your computer
3. Then run Rufus, on Boot selection, click the select button and point to the ISO file Aomeinya
4. The others are automatic settings as shown below.

How to Make Bootable Media AOMEI Partition Assistant


Note: Select GPT if your computer BIOS is UEFI, select MBR if your computer has Legacy bios

5. Then click the Start button, wait for the process to complete
6. please boot on your computer
7. Don't forget to first set the UEFI or MBR BIOS, First Boot is of course the name of the Flashdisk you use to make this bootable
8. Done..

So many tutorials that I can share, hopefully useful. That is all and thank you.

Monday, September 14, 2020

How to Mount File with ISO Format

How to Mount File with ISO Format

How to Mount a File with ISO format, I think there's nothing wrong with giving this short tutorial, because I've read a few friends who commented "Why is the FORMAT OF IMAGE FILE, or ISO FIEL" well ... my friend doesn't need to be confused, here I try to give a short tutorial, hopefully it's useful.

This step is how you make a VIRTUAL (simulation) CD / DVD ROM, so of course this software is very useful, because you can easily install ISO files without the need for BURNING or extracting the FILE.
 
How to Mount File with ISO Format


For Windows 8.1 or Windows 10 or Windows users above, to mount an ISO file no additional software is needed, just double-click the ISO file, then the file is mounted and ready to install. If you are still using Windows Xp or Windows 7, of course you need third party software to mount files. There are many softwares available to Virtual or Mount ISO files. Here are the ingredients, just choose one.

Note: For users of windows 8 or 10 or above, no need to go to the steps below, just right click the ISO file and select Mount

Ingredients !
=> Daemon Tools

Of the three materials, I chose ImDisk Virtual Disk Driver because it has the smallest size.

Steps to Mount the ISO File!

  • First download one of the materials above, if you have already installed it
  • because I use the ImDisk Virtual Disk Driver, so I give a tutorial using the ImDisk Virtual Disk Driver, but the point is the same.
  • Please install the ImDisk Virtual Disk Driver first
  • then when finished, right-click the ISO file to be Mounted
  • Please select mount as ..
  • Please select, OK and open the CD Drive Mount!
  • then you will get the contents of the ISO file and please install
  • When it's finished, please return to UnMount
  • Very easy right